
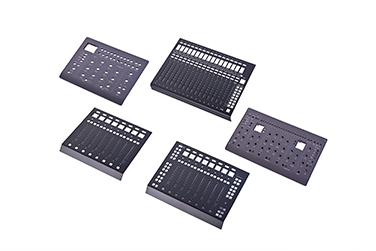
A customer in Germany sent us a drawing for an amplifier faceplate: 6061-T6, black anodized, 3,200 pieces. One line in the notes read "serial number, permanent, dot peen, 0.1 mm max depth." We ran it as written. Forty-one panels came off the CMM with a 0.09 mm bulge on the back face and would not sit flat on the chassis. Scrap, strip, re-anodize, re-mark: about 4,800 euro and six weeks lost while the customer rewrote the note. The panel was never the problem. The note was. Dot peen is a cold-working process, and cold work pushes metal somewhere. We moved the mark to a laser anneal, wrote the method, depth and acceptance grade into the drawing as a controlled feature, and the reject rate went to zero.
There are six part marking methods: laser annealing, laser engraving, dot peen, CNC scribing, chemical etching, and pad printing. Pick by material, finish and volume, not by habit. Annealing suits stainless and anodized aluminum at 0.002 to 0.01 mm, engraving suits painted or roughly handled parts at 0.02 to 0.15 mm, and dot peen suits thick castings but bulges thin walls.
Why the Method Is a Drawing Decision, Not a Shop Decision
When a drawing says "mark per standard practice," the shop decides. That works until the first article shows a mark 0.2 mm deep on a 0.8 mm wall, or an ink serial on a part wiped with solvent twice a day. A mark is a feature. It removes or displaces material, changes the local stress state, interacts with the coating, and either survives service or it does not.
We hold ±0.01 mm as our standard machining tolerance and tighten to ±0.005 mm only where fit demands it, so the pad under a mark sits where the drawing says. The harder half is choosing between the permanent part marking methods and writing that choice where both sides can inspect it. ASME Y14.5 governs how dimensions and tolerances are stated, and you can read its scope at ASME's Y14.5 page. A note that says "mark per sample" is not inspectable, and it is the most common cause of a failed first article on a good part.
Certification frames the rest. We run to IATF 16949, ISO 9001 and ISO 13485, so automotive and medical programs arrive with their own evidence expectations around first article inspection. If the project is aerospace, the conversation shifts toward AS9102 content, and we say plainly what we can issue and what we cannot.
The Six Part Marking Methods We Run
These are the six part marking methods we quote, run, or place with an audited partner, ordered by how often we reach for them. Metal part marking is not one decision. It is a material decision, a finish decision and a volume decision wearing one hat.
Laser annealing
A fiber laser heats the surface locally to between 200 °C and 500 °C and the metal grows an oxide in place. Nothing is removed, and depth lands at 0.002 to 0.01 mm, near the roughness of a machined face. On stainless it darkens the passive layer instead of breaking it, so it is our default for medical device work and for anything seeing salt spray. Its weakness is contrast on alloys that do not oxidize readily.
Laser engraving
Same machine, higher power density, material vaporizes. You get a real groove at 0.02 to 0.15 mm, a recast layer of a few microns, and a mark you can feel. We use it when the part will be painted, powder coated or handled roughly. It costs more per part and breaks the coating it cuts through, so on anodized aluminum we mark before the tank or accept bare metal in the character root.
Dot peen
A carbide stylus hammers a row of dots into the surface. It is fast, cheap and indifferent to surface finish, which is why it dominates heavy equipment and castings. It also displaces metal. On a 6 mm plate that is nothing; on a 1.5 mm faceplate it is a bulge. For automotive bracket and chassis work on thick sections we still quote it. On thin panels we no longer volunteer it. Castings are stricter again: our cast part identification marking guide sets out where the code goes on iron and steel.
CNC scribing and milled characters
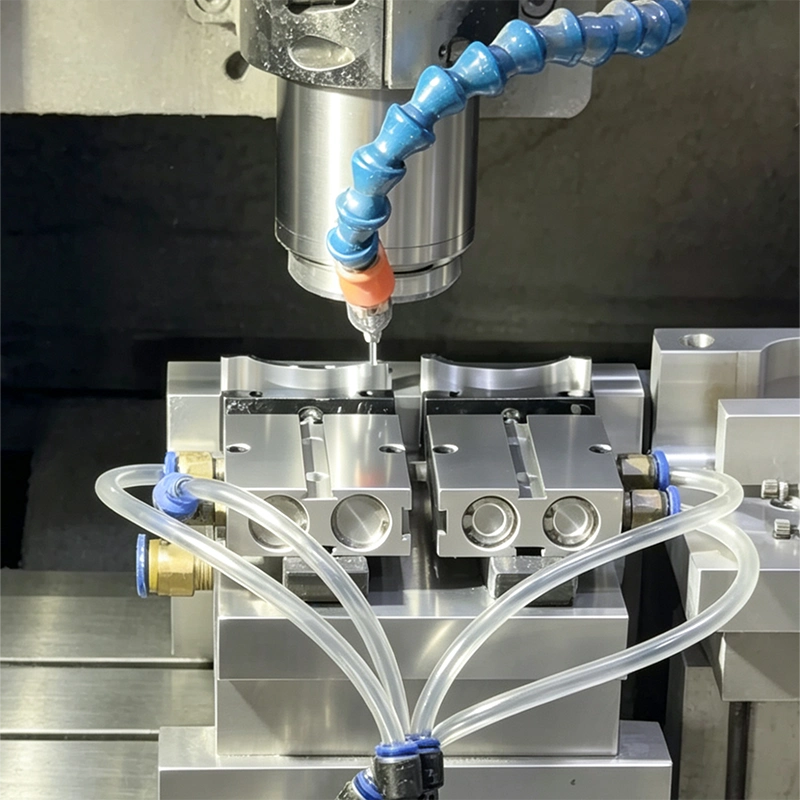
The same spindle that cut the part cuts the letters, usually with a 0.2 to 0.6 mm engraving tool. No heat, no consumable, no new equipment, so buyers assume it is free. It is not. A 40 character string takes 25 to 70 seconds of spindle time at full shop rate, and every character edge needs deburr. We use it when the mark must be deeper than a laser goes, or on our milling cells where one added operation beats a second handling.
Chemical etching
A masked chemical attack dissolves 0.01 to 0.05 mm of material. It is gentlest here in stress terms, marks a whole surface at once instead of tracing characters, and leaves no burr. It also makes waste needing treatment, undercuts the mask by roughly 0.05 mm, which limits how fine your characters can be, and demands a flat, degreased surface.
Pad printing and screen printing
Ink on top of the metal, 0.005 to 0.02 mm thick. It is the cheapest way to put graphics on a part, gives the highest contrast here, and is the only practical option on several engineering plastics. It is also the one method a solvent wipe defeats. We sell it for indoor housings and logos, and argue against it whenever the part gets cleaned. That argument is where most of our laser marking solutions for metal conversations begin, because buyers want ink appearance at ink prices with metal durability.
Depth, Stress and What Each Method Does to the Part
Choosing among part marking methods comes down to what happens below the surface. Buyers ask about depth. Engineers should ask about stress, and about what the coating does to that depth. These are our floor numbers, not vendor claims.
| Method | Typical depth | Subsurface effect | Cycle time per mark | Suited materials |
|---|---|---|---|---|
| Laser annealing | 0.002 to 0.01 mm | Heat affected zone 0.05 to 0.15 mm, nothing removed | 2 to 6 s for a 40 character string | Aluminum, stainless steel, titanium, plating |
| Laser engraving | 0.02 to 0.15 mm | Recast layer 0.005 to 0.02 mm, tensile stress at the groove root | 3 to 9 s | Aluminum, steel, stainless steel, titanium, brass |
| Dot peen | 0.05 to 0.30 mm displacement | Cold work to 0.5 mm below the surface, bulge on the opposite face | 8 to 20 s | Steel, cast iron, aluminum, brass |
| CNC scribing | 0.10 to 0.30 mm | Clean cut, no heat affected zone, exit burr on edges | 25 to 70 s | Aluminum, steel, stainless steel, plastics |
| Chemical etching | 0.01 to 0.05 mm | Mask undercut about 0.05 mm, attack on sensitized stainless | 60 to 180 s including masking | Stainless steel, aluminum, titanium, brass |
| Pad and screen printing | 0.005 to 0.02 mm ink film | None on the substrate | 4 to 10 s plus 20 to 40 s cure | Metals, anodize, plastics, glass filled nylon |
Wall thickness turns this table into a decision. We mill aluminum walls to 0.5 mm and steel walls to 1.0 mm, and a mark on the outer face of a wall that thin is not cosmetic. A 0.2 mm dot peen on a 0.5 mm aluminum wall has taken 40 percent of the section locally. Our rule at quote stage is blunt: if the wall behind the mark is at minimum, the mark becomes an anneal or an etch, or it moves. That conversation happens during free DFM, before any metal is cut.
Finish matters in the other direction. On milled faces, laser marking on machined parts must be set against the lay and roughness you specified, not a polished coupon, because the beam sees a different optical surface. Our surface roughness guide has the numbers.
Material by Material: What Marks Cleanly and What Does Not
Alloy behavior decides more of this than any machine setting. A list of part marking methods is only useful once you know which alloys it applies to. Contrast ratios below come from production parts, with no dye or ink added.
| Material | Method we pick first | Contrast with no added color | What goes wrong |
|---|---|---|---|
| 6061-T6 and 6063 aluminum | Laser annealing | 3.5:1 to 5:1 bare, higher after anodize | Deep engraving smears, groove collects coolant and dye |
| 304 and 316L stainless steel | Laser annealing | 4:1 to 6:1, oxide grown in place | Wrong parameters give a rainbow oxide an auditor reads as contamination |
| Carbon steel, 1018 and 1045 | Laser engraving or dot peen | 2.5:1 to 4:1 | Bare engraved marks rust within days unless sealed |
| Ti-6Al-4V | Laser annealing | 5:1 to 8:1, straw through blue as energy rises | Too much energy grows a thick oxide that flakes under tape |
| Brass and C3604 | Laser engraving | 2:1 to 3:1, weak | Annealing barely shifts the color and zinc fuming leaves a halo |
| Anodized aluminum, Type II | Laser annealing after anodize | 6:1 to 10:1, near black in the pores | Engraving through the anodize exposes bare metal and dye bleeds |
| Plated surfaces, nickel, chrome, zinc | Laser annealing at low power | 3:1 to 5:1 | Excess energy burns through the plate and you lose protection at the mark |
| Engineering plastics, POM, PC, PA66-GF30 | Pad printing, or CO2 on some grades | Ink gives 8:1 to 12:1 | Glass filled nylon laser marks gray and patchy |
Anodized aluminum is the best substrate we mark and the easiest to ruin. The oxide grows both into and out of the surface, so a mark applied before anodizing ends up locked inside the coating, while a mark applied after sits on a hard, brittle layer. Both routes appear in our anodizing guide and, for thick coatings, the hard anodizing guide. Our surface treatment capability shares a building with the laser cells, because sequence matters more than the step.
Stainless is the second material worth a note. Anneal marking on 316L keeps the passive layer intact, so it is standard for stainless steel components in medical and food equipment. Ablation strips that layer at the bottom of every character, and in a chloride environment the mark becomes the corrosion initiation site. Want a deep tactile mark there? We cut it, passivate again, and say so on the quote.
On aluminum, finish matters more than temper. Our aluminum machining guide covers the alloys we stock. For marking, 6061 and 6063 anneal to a consistent dark gray, 7075 goes patchy from its zinc content, and cast A380 varies enough that we sample each lot.
Durability: Salt Spray, Abrasion, Heat and Coating
In service, marking on metal parts fails for three reasons: coating, abrasion and heat. Data below comes from production parts at the depths listed above.
| Test | Laser anneal | Laser engrave | Dot peen | Chemical etch | Pad print |
|---|---|---|---|---|---|
| 96 h neutral salt spray, 5 percent NaCl at 35 °C | No change | No change on stainless, light bloom on steel | No change on stainless, rust bloom on steel | No change | Edge lift, ink softens |
| 500 h neutral salt spray | No change | No change on stainless, cosmetic bloom on carbon steel | Cosmetic bloom on stainless, rust on carbon steel | No change | Failed between 200 and 300 h |
| Taber abrasion, CS-10 wheel, 1 kg, 500 cycles | Readable, contrast drops about 20 percent | Readable, groove shallows by 0.01 mm | Readable, dot edges flatten | Readable, edges soften | Removed between 180 and 300 cycles |
| 200 °C for 2 h in air | No change | No change | No change | No change | Yellowing, adhesion loss |
| 50 double rubs with isopropyl alcohol | No change | No change | No change | No change | 10 to 20 percent ink transfer |
| Coating applied over the mark | Survives 20 micron clear coat | Survives powder coat at 60 to 120 micron | Survives, edges fill slightly | Survives thin film, bridges under powder | Ink goes on top, never under |
Read it as a filter, not a scoreboard. Indoors in a 3C housing, only the solvent row matters and you should buy on appearance and cost. Under a vehicle, the 500 h row decides. On a surgical instrument seeing 134 °C steam, the heat row decides and ink is off the list. Four of the six part marking methods clear 96 h on stainless. Pad printing does not, and only three still look presentable at 500 h.
One thing we insist on: verify after the coating, never before. A code that grades 4.0 on bare aluminum tells you nothing about that code under 100 microns of powder, and coating flow is the usual reason a marking plan that looked right on paper fails in production. It is also the step most metal part marking plans skip.
What Each Method Costs and How It Shows Up on Your Invoice
Buyers usually compare two numbers that are not comparable, so here is the structure behind a 500 piece run.
Where the mark is a UDI and carries variable data, the drawing follows its own set of rules: what a UDI direct part mark needs from the part.
| Method | One time setup | Per part mark, 500 piece run | Handling and inspection | Where the money really goes |
|---|---|---|---|---|
| Laser annealing | $40 to $80, program plus fixture | $0.25 to $0.45 | 4 s vision check per part | Parameter development, then machine time only |
| Laser engraving | $40 to $80 | $0.40 to $0.70 | 4 s vision check, deburr on deep passes | Machine minutes and fume extraction |
| Dot peen | $60 to $120, stylus and fixture | $0.70 to $1.20 | Flatness check on thin parts | Stylus wear and fixture design |
| CNC scribing | $0, tool already in the magazine | $1.20 to $2.60 | Deburr and wash | Spindle minutes at full shop rate |
| Chemical etching | $150 to $400 for the mask | $0.60 to $1.10 | Rinse, neutralize, dry, waste handling | Mask artwork, chemistry disposal |
| Pad printing | $120 to $250 per cliche or screen | $0.18 to $0.35 | Cure time, adhesion check | Setup labor, ink shelf life |
Now the arithmetic, because this is where the decision gets made. At the middle of each range, laser marking metal parts on a 500 piece anneal run is 500 times $0.35, or $175, plus a $60 fixture: $235 all in. CNC scribe is 500 times $1.90, or $950, and buys a deeper mark most buyers do not need. At 3,000 pieces the gap widens to roughly $4,600, because scribe cost is $1.90 of spindle time per part while the laser carries a one-time $60 program and then only about $0.35 of machine time per part.
The crossover flips at low volume. On a 10 piece prototype the laser program and fixture cost $40 to $80 against $19 of scribe time, so the scribe wins. That is why we ask about annual volume before recommending anything, and why our machining cost guide keeps marking as its own line item. machining lead time follows the same logic: a laser needs a program and fixture, a scribe rides on work we already do.
Case: One Audio Faceplate, Four Quotes
*(Composite example; details changed.)*
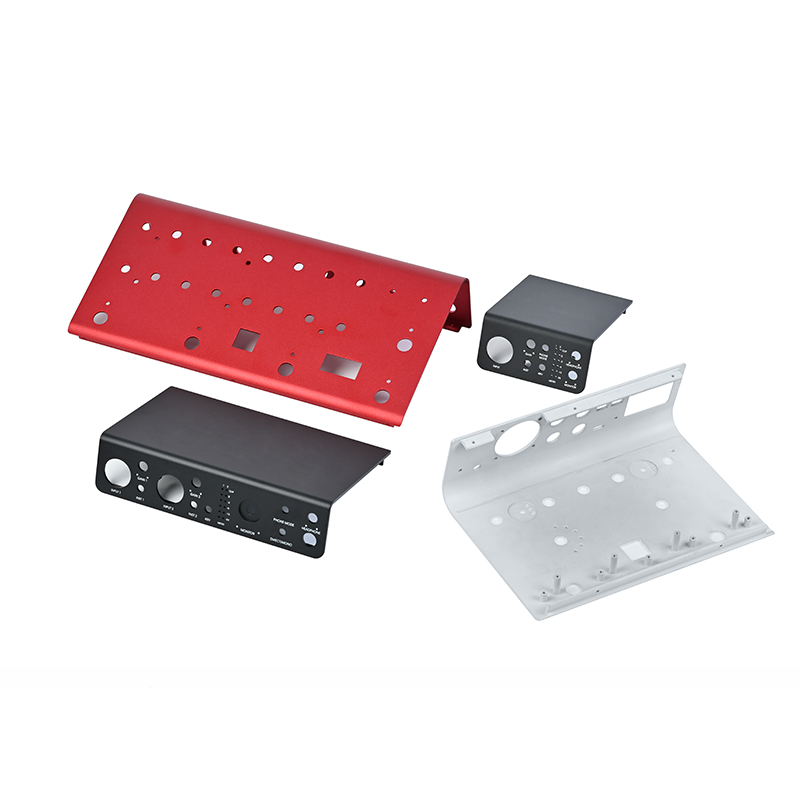
A hi-fi brand asked us to quote a desktop DAC faceplate: 180 × 44 × 3 mm, 6061-T6, black Type II anodize at 8 to 10 microns, 500 units, with a logo, a model string, a 12 character unique serial and regulatory symbols. The drawing said "permanent mark" and left the method open, so we quoted four options.
Option A was laser anneal after anodize: fixture $70, $0.34 per part, $240 total, 4.1 s per part including vision verification, 0.004 mm deep, the character staying inside the anodize so corrosion performance was untouched. Option B was laser engrave at 0.08 mm through the anodize into base metal: fixture $70, $0.58 per part, $360 total, sharper in photographs, but it exposed bare aluminum in every character and needed a sealer. Option C was dot peen before anodize at $110 for the fixture plus stylus wear and $0.95 per part, $585 total; on 30 samples, four went from 0.04 mm to 0.11 mm of flatness error, visible as rock on glass. Rejected. Option D was screen print at $190 for the screen and $0.24 per part, $310 total, best looking of the four, and it failed the customer's 500 cycle abrasion test at about 240 cycles.
They took option A. Against the engrave they saved $120; against the print they saved the rework risk, which was the real money. First pass read rate on the serialized Data Matrix was 100 percent across 500 panels, and the verified symbol grade was 3.6/10/660, well above the 3.0 floor most of our audio equipment customers write into inspection plans. Mark location was dimensioned at ±0.2 mm to the panel edge, which our standard ±0.01 mm tolerance covers without effort, so the only real work was the laser program.
Reading a Mark: Contrast, Grade and Verification
A mark a person can read is not automatically a mark a scanner can read, and that gap is where assembly lines stall. ISO/IEC 15415 grades two dimensional symbols from 4.0 down to 0.0 in half steps: 4.0 is an A, 3.5 a B, 3.0 a C, 2.5 a D, 2.0 an E, 1.5 and below an F. Grade is reported as grade over aperture over wavelength, so 3.6/10/660 means grade 3.6 at a 10 mil aperture under 660 nm light. Automotive and medical customers usually set a floor of 3.0, and a warehouse handheld reads down to about 1.5.
Direct part marks are not printed on a label, so contrast behaves differently, and ISO/IEC TR 29158 adapts the grading method to that case. We cite the number because it changes acceptance: on a milled face with directional lay, an anneal mark reads differently along the lay than across it. We orient Data Matrix symbols across the lay for that reason, one line in the laser program.
Verification is not a spot check at the end. We grade the first piece and every fiftieth afterward, logging the result against the serial so the record travels with the part. That is the backbone of the traceability system we build for serialized programs, and it is only as good as the metrology behind it. Our inspection room runs to the same discipline as our CMM inspection work, with the measurement chain referenced through NIST and the SI maintained by BIPM, so a grade we report in Dongguan means the same in Stuttgart. Zeiss equipment covers the dimensional half. In practice, laser marking of metal parts creates the optical surface this grading depends on, so parameter development is engineering work, not setup.
What Buyers Actually Ask Us
The first question is whether we can mark after anodizing without wrecking the finish. Yes, and on Type II we prefer it, because the mark lands inside the oxide instead of under it. The exception is hard anodize above 25 microns, where an anneal mark loses contrast and an engraved mark reads as a scratch.
The second is whether the mark hurts corrosion resistance, and the answer depends on whether the method removes the protective layer. Anneal does not. Ablation does. We print which one we quote on the quote itself, because part marking methods that look identical on a sample coupon behave very differently after 500 hours of salt.
The third is whether a scanner still reads it after powder coat, and the answer is sometimes. A 0.15 mm engraved code survives 60 to 120 micron powder and still grades 2.5 to 3.0, while a 0.005 mm annealed code will not. If the drawing calls for both, we tell the buyer to go deeper or mask a bare window, and send both samples.
Then there is how to mark a metal part already built into something bigger. It comes up constantly in field service and warranty work, and in marking non-removable parts that cannot be pulled from an assembly without destroying it. Our answer is a portable fiber unit with a local fixture, run at reduced power, always away from sealing faces and load paths. We will not peen an installed part, because the impact load travels somewhere you cannot see.
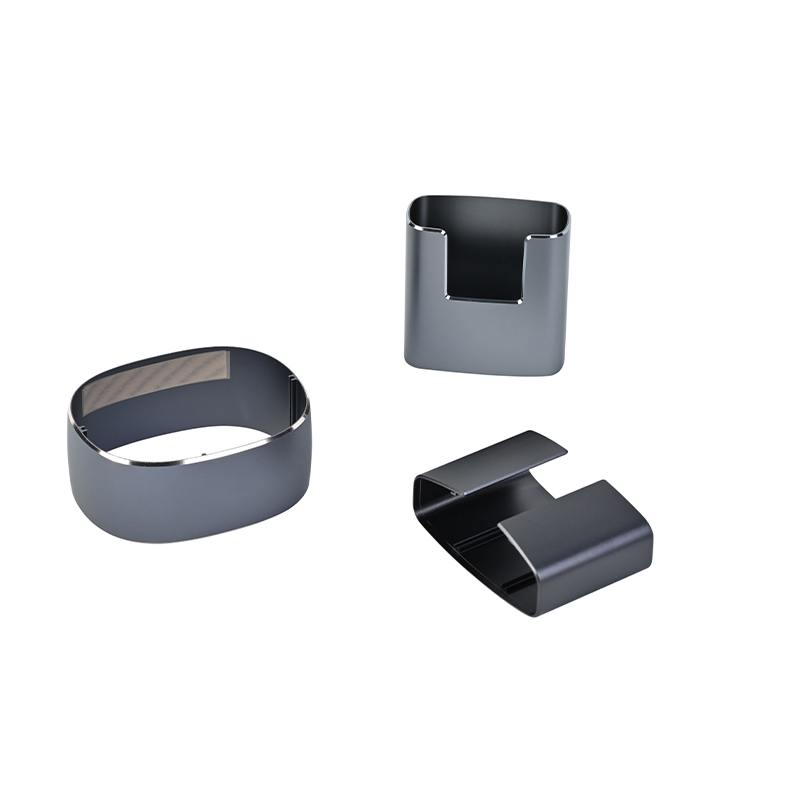
Size is the last recurring one. Small housings such as in-ear monitors leave 6 to 10 mm of usable flat area, enough for a 4 mm Data Matrix and nothing else. The large end runs through our 5-axis capability: travels up to 750 × 650 × 500 mm with an A/C trunnion of ±120° / 360°, so one part can be Ø500 × 400 mm and still be marked in the same setup. Anything larger goes on a milling cell with a 1000 × 500 × 300 mm envelope. Which bracket your part falls into sets the fixture, and the fixture is half the setup cost.
How to Specify the Mark on Your Drawing
Eight lines on a drawing remove almost every disagreement above. Stampings need two more, and they are in our stamped part marking guide. Write them once and every supplier quotes the same job.
- Name the method. "Laser anneal" is a specification. "Permanent mark" is a wish.
- Give depth and tolerance: 0.005 mm plus or minus 0.003 mm for an anneal, 0.10 mm plus or minus 0.03 mm for an engraving, adjusted for coating.
- Dimension location from datums, not from an edge trimmed later. ISO 2768 general tolerances will not control a mark you care about.
- State character height and font. About 2.5 mm is the practical floor for hand held scanning.
- State symbol type and minimum grade if machine read: "Data Matrix, minimum ISO/IEC 15415 grade 3.0" is unambiguous.
- Say whether the mark goes before or after the finish. This one line prevents most of the rework we see.
- Indicate surface texture around the mark per ISO 1302, because finish changes laser settings and contrast.
- Say where the mark must not go: sealing faces, journals, minimum thickness walls, anything within 10 mm of a weld.
Not sure which of the six part marking methods belongs on line 1? Leave it open and tell us the material, the finish, the volume and the service environment. We run sample coupons and send photographs at no cost, because DFM is free and a quotation comes back within 24 hours. For most finishes, laser marking for metal parts is our default in about seven jobs out of ten, but we say so only after seeing the finish callout.
Frequently asked questions
Which part marking methods are permanent?
Laser annealing, laser engraving, dot peen, CNC scribing and chemical etching all alter the metal itself, so the mark cannot be washed off. Pad and screen printing leave an ink film and count as semi-permanent: fine for logos and indoor housings, wrong for asset identification.
How deep should a permanent mark be?
Deeper is not better. We spec about 0.005 mm for an anneal and 0.10 mm for an engraving, and go deeper only when a coating must be survived. Extra depth removes material and adds stress for no gain.
Can you laser mark an anodized part without breaking the anodized layer?
Yes, and that is what we recommend on Type II anodize. Annealing darkens the oxide in place at roughly 0.004 mm, leaving the layer sealed and corrosion performance unchanged. Engraving cuts through it and leaves bare aluminum needing a sealer.
Does dot peen marking distort thin parts?
It can. Peening displaces metal instead of removing it, so on a wall under about 3 mm the opposite face bulges. We measured 0.07 mm of added flatness error on 1.5 mm aluminum panels, enough to stop a faceplate sitting flat. On thin walls we switch to anneal or etch.
How do you handle marking non-removable parts already built into an assembly?
We bring a portable fiber laser, fixture it locally and mark at reduced power in an area that is neither a sealing surface nor a load path. We refuse impact methods on installed components, because the force transmits into the assembly where nobody can inspect it.
What does a laser marking service on parts cost on a small batch?
Budget a $40 to $80 one-time program and fixture charge, then $0.25 to $0.45 per part at 500 pieces for an anneal. Below about 30 pieces the setup dominates, so we fold characters into an existing CNC program and charge spindle time.
Can you verify the mark and give us a record?
Yes. We grade the first piece and every fiftieth thereafter, log the ISO/IEC 15415 grade against each serial, and ship the record with the paperwork. On IATF 16949 and ISO 13485 programs it is part of the document package.
Conclusion
23+ years and 200+ CNC machines have taught us that marking arguments are almost never about the machine. They are about a designer who specified a finish in one corner of the drawing and a serial number in another, and never connected the two. We would rather have that conversation at the quote stage than at first article. Send us the material, the finish, the annual volume and where the part lives in service, and we will come back with a method, a depth, a per piece cost and sample photographs within 24 hours, with DFM free. We run to IATF 16949, ISO 9001 and ISO 13485, and we will tell you when a cheaper method is the right one. Get in touch with our team.